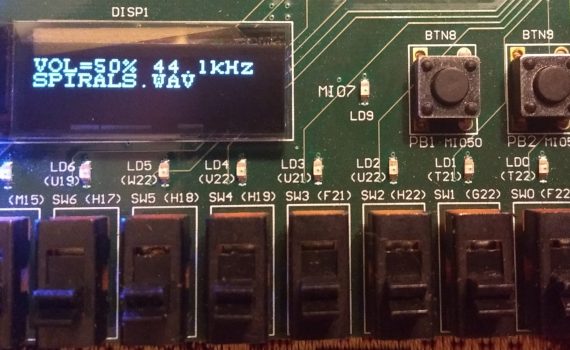
In a previous post, we added an AXI timer to create a periodic interrupt. In this tutorial we are going to add support for the OLED screen to the WAV player project. This makes it a fully self-contained application which can be used without a PC. In this tutorial we […]
Zedboard Tutorials
18 posts
In a previous post, we added GPIOs to our WAV player to enable a simple user interface. In that example we triggered an interrupt whenever a key was pressed. However, I found it hard to debounce the keypad as we would have to somehow disable new interrupts for a while […]
In a previous post, we made a simple WAV file player which feeds the DMA controller from an interrupt routine. Currently the player is controller through the terminal connected to the UART. The Zedboard has LEDs and buttons which we can use as user interface. So let’s create a simple […]
In a previous post, we made a simple WAV file player which loads the WAV file completely into RAM and plays it from there. That is not ideal for a few reasons. First of all loading a 300MByte WAV file from SD card takes a few seconds. Furthermore, we are […]
In a previous post, we made a simple WAV file player. That demo used a fixed sampling rate of 39kHz which resulted from simply dividing the 100MHz system clock. Now let’s use the standard audio sampling rates of 44.1kHz or 48kHz. In order to achieve this, we need to use […]
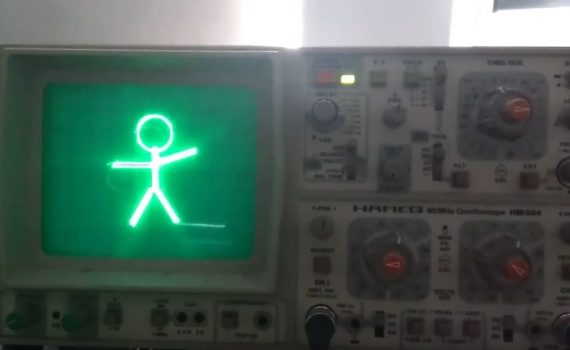
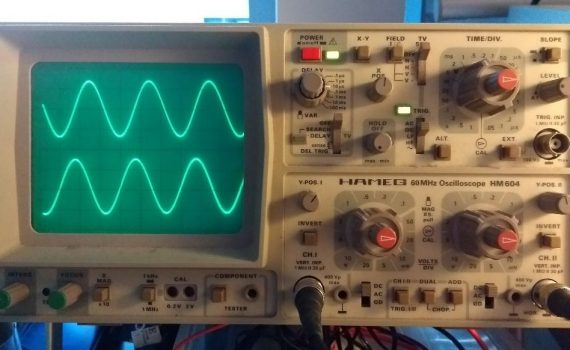
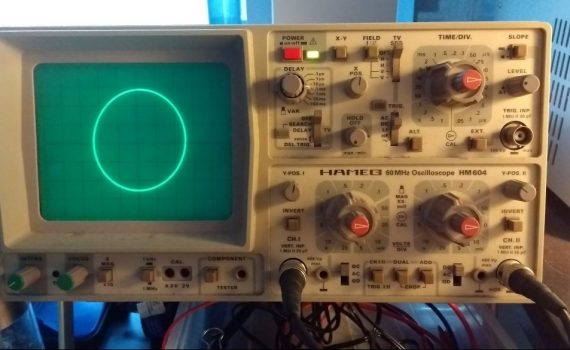
I stumbled across Jerobeam Fenderson’s YouTube channel a while ago and I was fascinated by his work. He probably creating the field of “Oscilloscope Music”. Before, there were just Lissajous curves. In a nutshell, you connect the left and right channel of your audio source to an oscilloscope while playing it […]
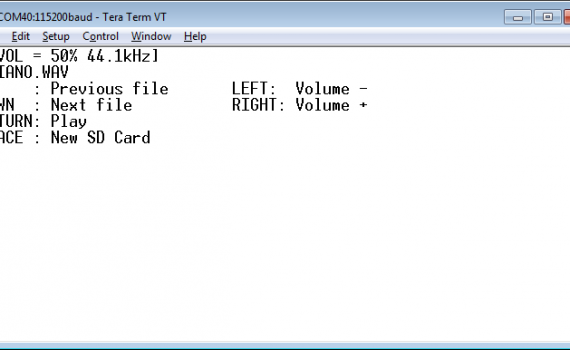
I thought it would be nice to play audio files as a demonstration. So, let’s read WAV files from an SD-card and send them to the audio codec. In this tutorial we learn: How to access the SD card slot. How to increase the heap size. How to parse a […]
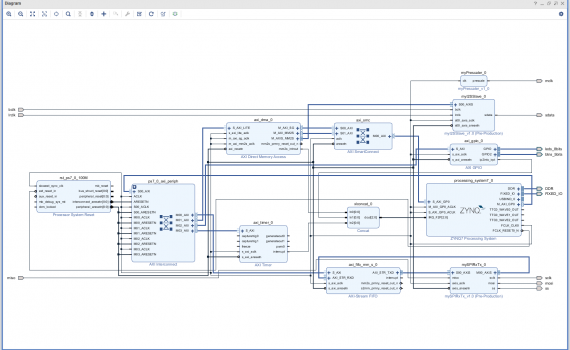
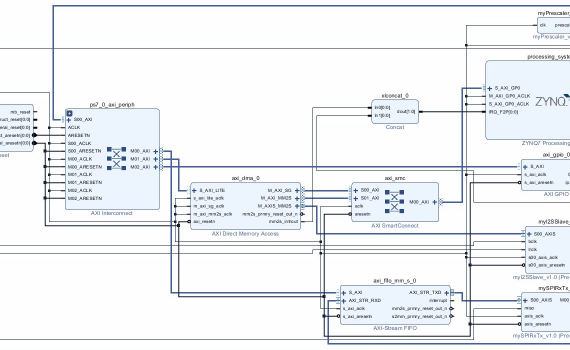
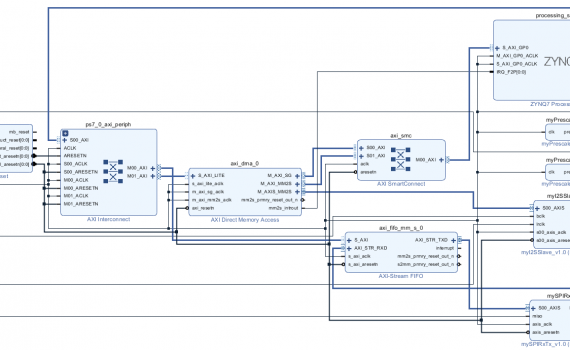
Now it is going to pay off that we are using an AXI interface on our I2S transmitter. We can now exchange the FIFO with a DMA controller. DMA stand for “Direct Memory Access”. The DMA controller can move data from the main memory to the AXI stream interface without […]
The previous tutorial showed how to use an I2S IP core to send audio data to the ADAU1761 codec of the Zedboard. We used a polling loop to keep the FIFO filled. In this tutorial we will connect the interrupt output of the FIFO to the ZYNQ fabric and have […]
In this tutorial we add an I2S transmitter to the design. This enables us to finally generate an audio signal. This tutorial is based on the last post where we already configured the codec. In this tutorial we will learn How to create an I2S interface with a slave AXI […]
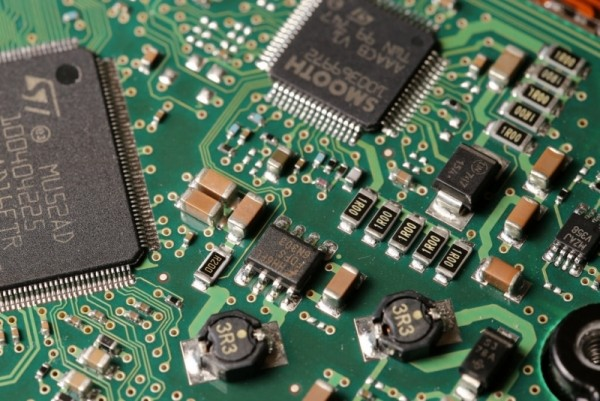
In this tutorial we create a bidirectional SPI interface. A regular SPI interface receives a word for every word it transmits. So, we need two AXI stream interfaces. One slave and one master. This tutorial will be less verbose than the others showing only screenshots of the most notable items. […]
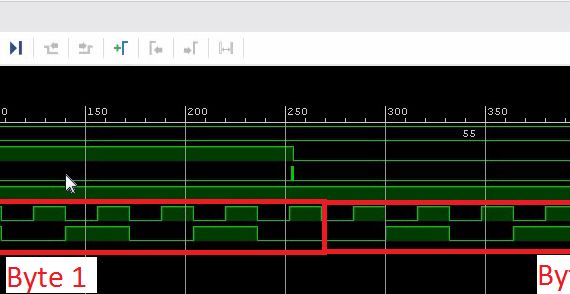
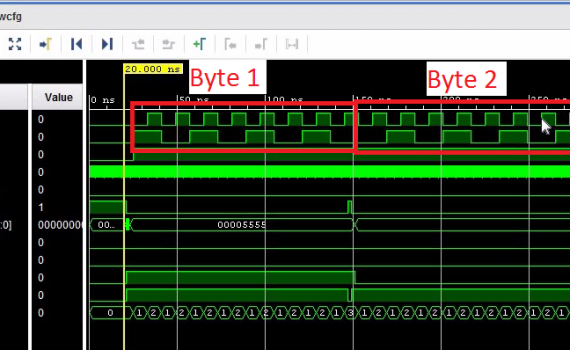
Want to probe signals? Just use the built-in logic tester. OK. It’s not quite a replacement for a real logic tester. But it is immensely useful. For debugging purposes, you can add Debug Cores to the FPGA which record digital signals into on-chip memory (probably block RAM). You can use […]
In the previous post we learned how to create an SPI transmitter with an AXI Stream interface. Now let’s use it in a block diagram. And write some C-Code to drive it. We will not hook up real hardware to the SPI as this is just for demonstration. In this […]
AXI Interfaces are awesome because you can connect wires to them. AXI interfaces are widely used within the Xilinx and ARM ecosystem. I found it’s well worth the time to write your own code using these standard interfaces because it allows you to connect to existing infrastructure. It is, for […]
To make an IP core reusable, we will need customization parameters which the user can change. In this tutorial we learn How to edit an IP core from your top-level project. How to add a parameter to the Verilog code. How to add a customization parameter to the customer-facing GUI. […]
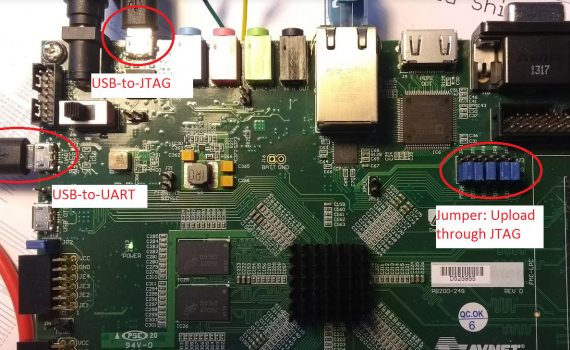
Getting started with the ZYNQ, all I wanted was running a simple Blinki code in Verilog. This turned out to be much more complicated than I thought. Most tutorials show you how to write your Verilog code, how to write your C-Code and how to execute everything once finished. While […]
Beauty is in the eye of the beholder. Blinki is far more impressive if you know what’s under the hood… In this tutorial we learn how to create a custom IP core from a Verilog file which can be used in a block diagram. how to assign a package pin […]
Every project starts with a blinking LED. The Zynq FPGA family comes with an ARM processor (Xilinx calls it PS) and an FPGA fabric (referred to as PL). In order for something to run, we need to care about both sides. We have to create a “bitstream” which configures the […]