The previous tutorial showed how to use an I2S IP core to send audio data to the ADAU1761 codec of the Zedboard. We used a polling loop to keep the FIFO filled.
In this tutorial we will connect the interrupt output of the FIFO to the ZYNQ fabric and have an interrupt service routine called when the FIFO fill level is too low.
This tutorial is based on the last post.
In this tutorial we will learn
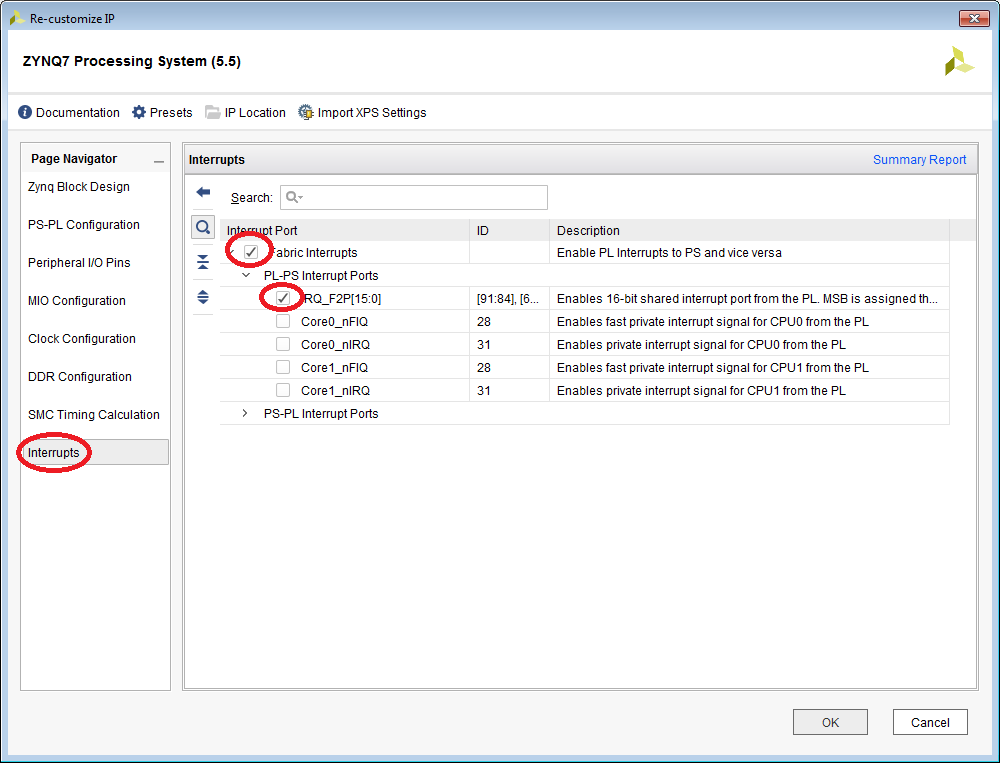
- How to add an interrupt input to the ZYNQ Processing System
- How to invoke the interrupt controller in the C-code.
- How to call an interrupt service routine when the FIFO fill level becomes low.
Create the Main Project
- Start with the project from this post. Or download the complete project further down.
- Open the block design and double-click the ZYNQ Processing System. Enable the interrupt input:
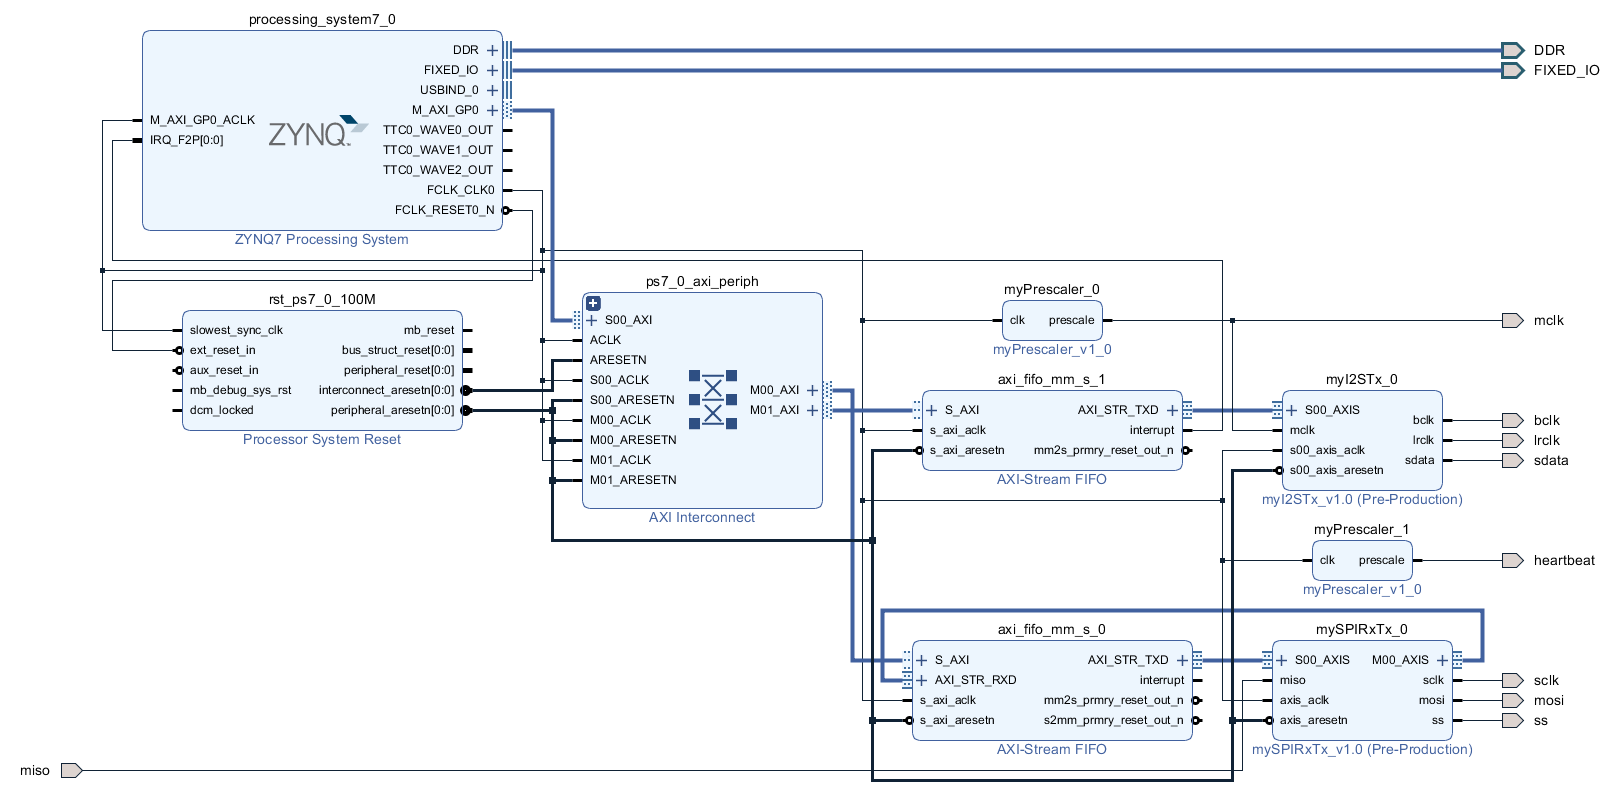
- Connect the interrupt output of the I2S FIFO to the interrupt input at the ZYNQ Processing System.
The Complete Block Design
Create the Bitstream
- Generate the bitstream.
- Open the Implementation.
- Now is a good time to launch the SDK. I encountered problems occasionally that the SDK creates a new system wrapper project. Normally there is a project named design_1_wrapper_hw_platform_0. I then have two of those. The second one named design_1_wrapper_hw_platform_1. I found the best way to resolve this was to remove both (!) projects and delete the files (you can right-click and select “Delete”). Then close SDK, export the hardware again and re-launch SDK. The project will be regenerated.
- Export Hardware (including bitstream).
Modify the C-Code
- If you haven’t done so, launch the SDK and make sure it recompiled the board-support-project.
- You might want to check if the right UART driver is selected (refer to “SDK Auto Update Bug“).
- Here is the full modified code (helloworld.c):

- Run the program. You should see this:
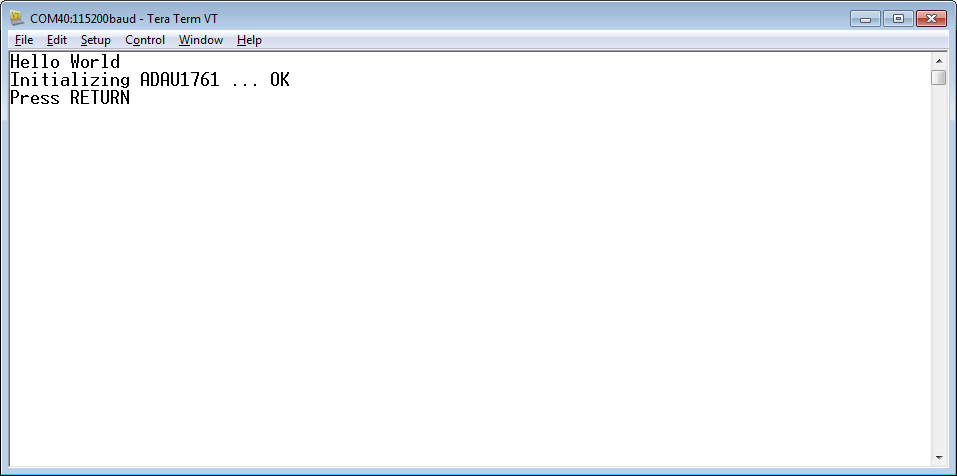
- If you connect a speaker to the LINE output you should here a tone.
- Press RETURN and the tone will stop.
Download the Complete Project
- To upload the software to the Zedboard, open the project in Vivado, then click on “Launch SDK”.
- There seems to be a bug when updating the SDK project which selects a wrong UART driver (refer to “SDK Auto Update Bug” to fix it).
- Select the project SPIRxTxDemo and click “Run” (the “play” button at the top of the window).
Next: DMA-Driven Audio Output
- Learn how to use a DMA controller to do the audio output automatically.
