Getting started with the ZYNQ, all I wanted was running a simple Blinki code in Verilog. This turned out to be much more complicated than I thought.
Most tutorials show you how to write your Verilog code, how to write your C-Code and how to execute everything once finished.
While this is the most common use-case, this can be quite overwhelming. At the beginning, I didn’t want to be bothered with the SDK at all. Here is how you can run the FPGA (aka the PL side) without compiling C-code.
In this tutorial we learn
- How to upload a bitstream to the ZYNQ through JTAG without the help of a C-program (or the SDK)
Setup the Zedboard
- Make sure the boot jumpers are set like this:
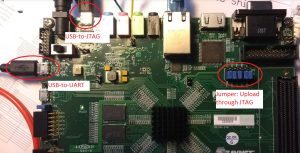
Make sure to use this jumper setting to upload through JTAG. - Turn your Zedboard off and on again

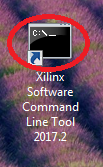
Run Xilinx Software Commandline Tool
- Double-click this shortcut on your desktop:
Find ps7_init.tcl in Your Project
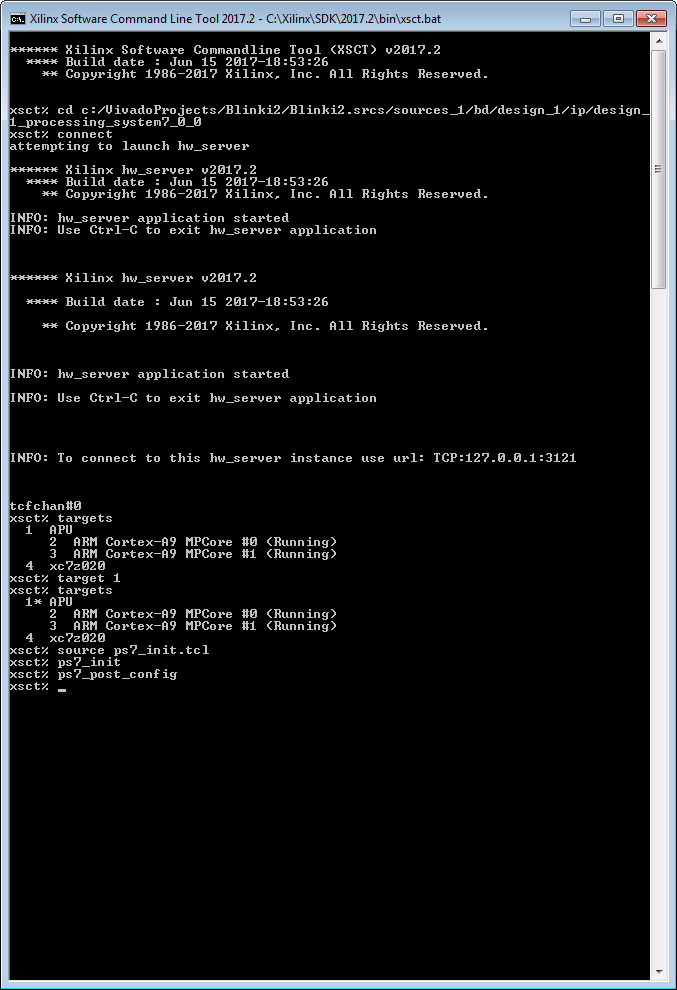
- Once you have created the bitstream for your project, you need to find the file ps7_init.tcl
- In my example it is located here:
c:/VivadoProjects/Blinki2/Blinki2.srcs/sources_1/bd/design_1/ip/design_1_processing_system7_0_0/ - Note that this script contains the initialization sequence for the PS. I think, the contents depends on how the ZYNQ processing system is configured in the block diagram. So, it is probably important to always use the script which is generated in your project rather than using a generic script.
- Use the “cd” command to change into this directory. Make sure you use forward slashes instead of the Windows-style backslashes!

Initialize the PS
- Load ps7_init.tcl using the command “source ps7_init.tcl”. This gives you access to the functions ps7_init and ps7_post_config.
- Use the “connect” command to connect to the Zedboard.
- Use the “targets” command to get a list of targets (you could skip this).
- Use the command “target 1” to select your target.
- Call “ps_init” and then “ps_post_config”.
- The PS is now initialized. You can now upload your bitstream.
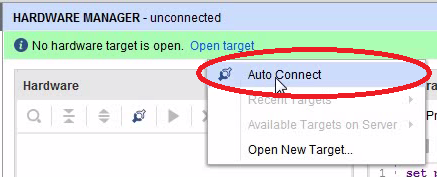
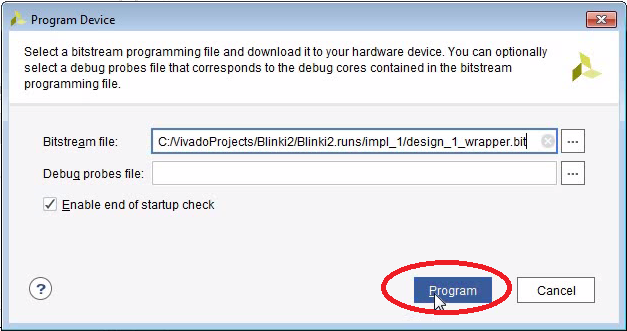
Upload Bitstream
- Use the Hardware Manager in Vivado to upload the bitstream.
- As long as you don’t power-cycle the Zedboard, you can repeatedly upload the bitstream.


Hint: Put xsct.bat into Your Search Path
- This is not 100% necessary. But I found it makes things a lot easier.

- Locate ps7_init.tcl in the Windows Explorer. Some Windows versions have a “Command prompt from here” context-menu. I prefer Total Commander, however. You can search for the file and type cmd, which gives you a command prompt in that directory.
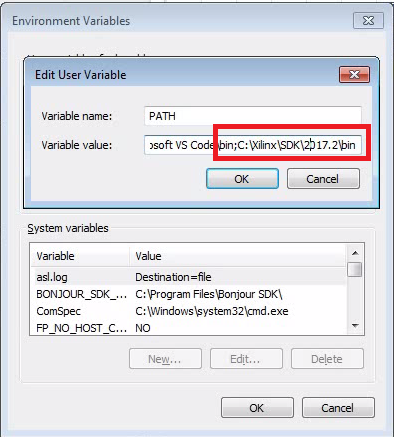
- Type “xsct” which opens the Xilinx Software Commandline Tool.